How to replace a leather strap
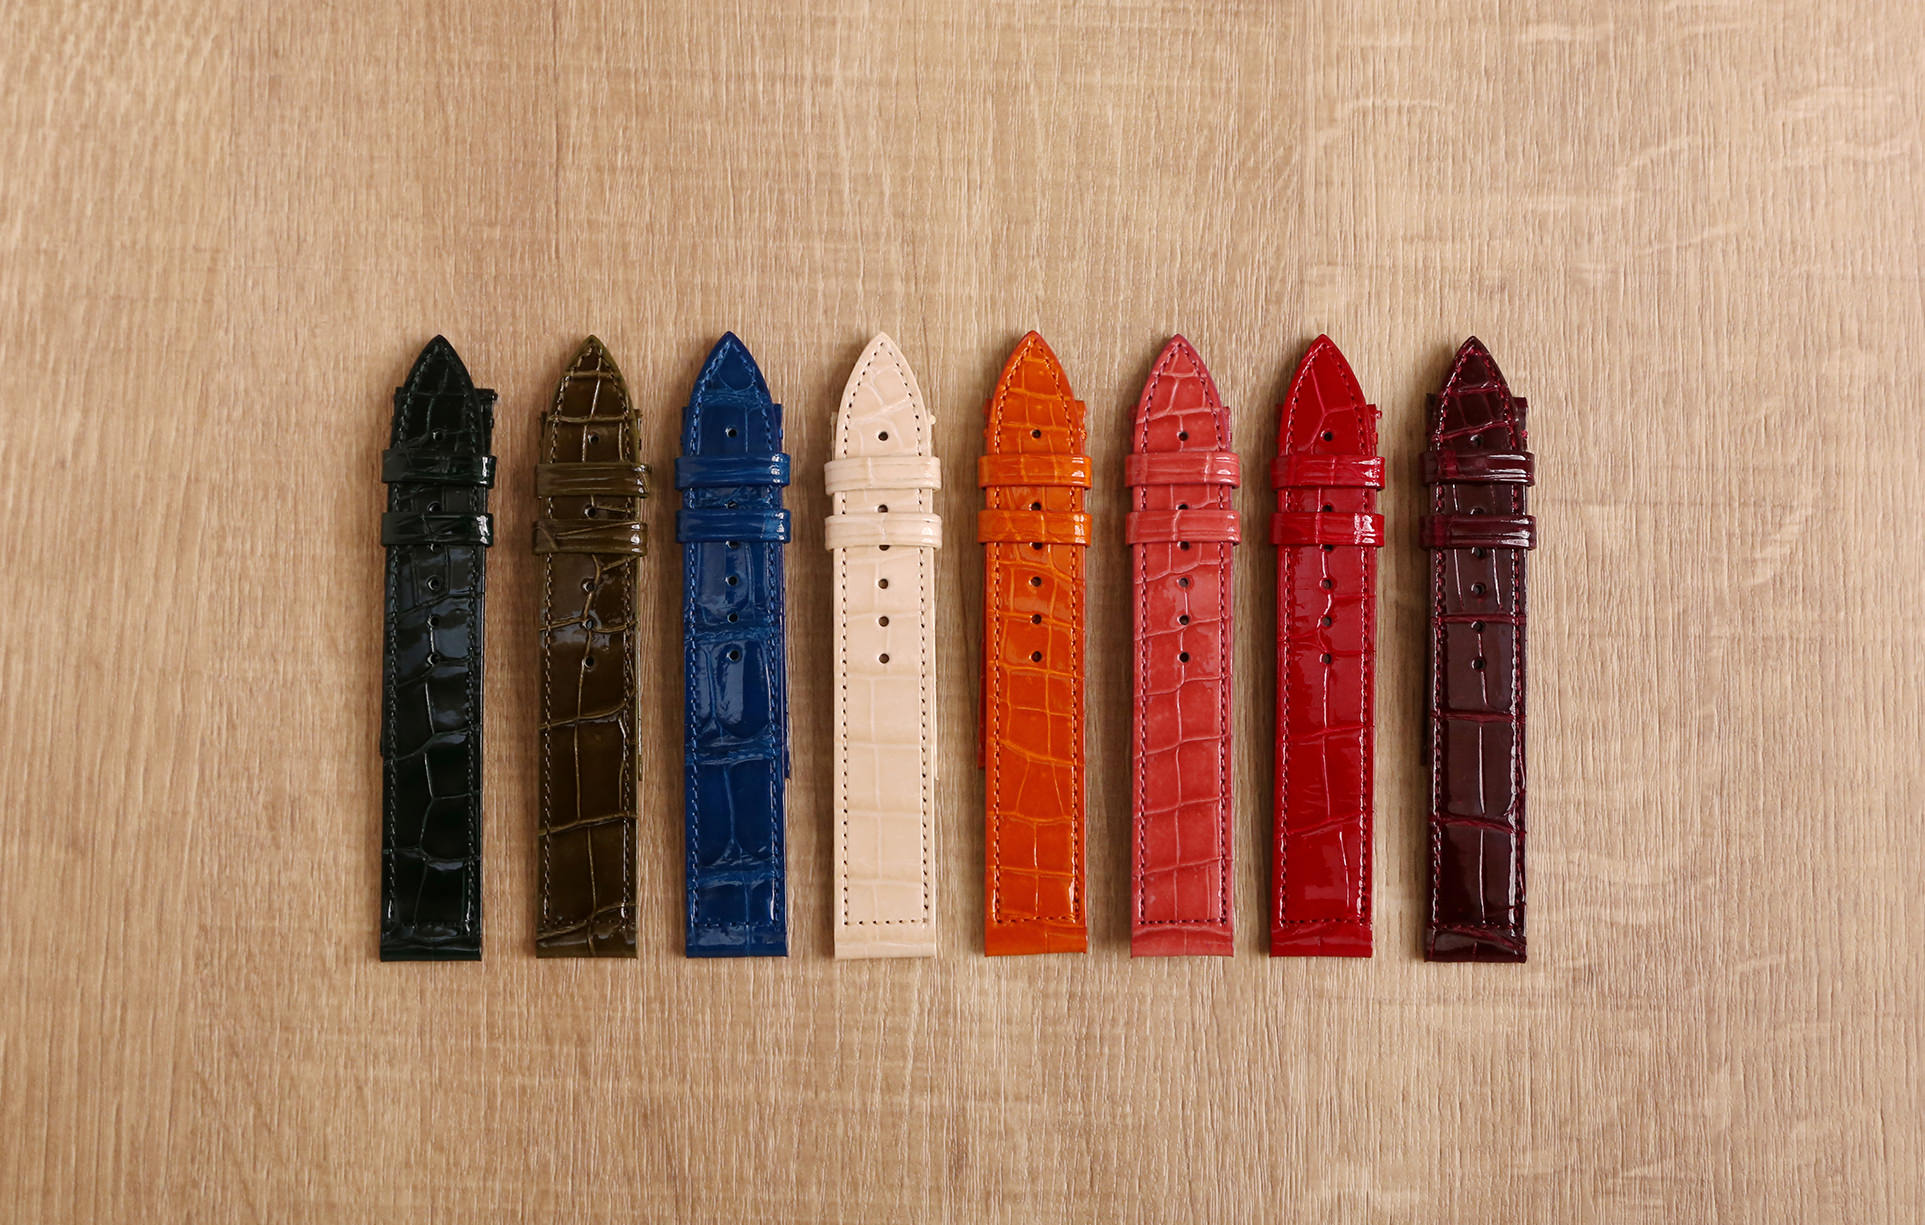
Replacing a leather watch strap doesn't necessarily have to be done by the manufacturer or a watch repair shop. With the right tools and a little knowledge, you can easily change it yourself. Once you learn how, you can enjoy different straps depending on your mood or the occasion, just like changing clothes, enriching your watch-wearing experience.
Here's an easy way to change your watch strap.
How to replace a leather strap
How to replace a buckle/clasp
Tools used for belt replacement
Regarding the tools used for belt replacement
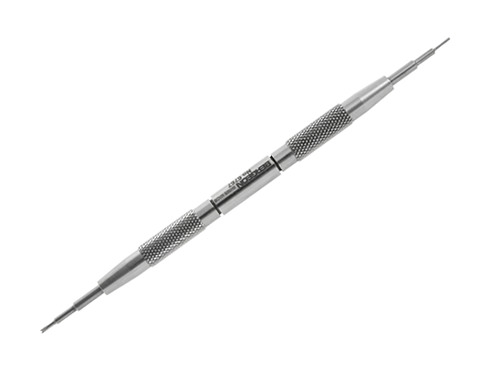
Spring bar removal tool
This is an essential specialized tool for changing watch straps. The pins attached to both ends hook onto the protrusions on the spring bars and push them out from the lugs. The pins come in two shapes: pin-shaped and Y-shaped. Use the former if the lug holes are on the case surface, and the latter if they are not.
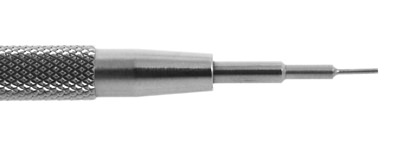 ...Pin type: Used for rugs with holes.
 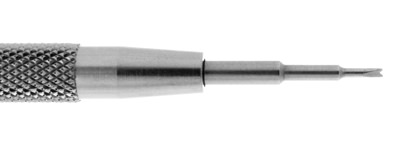 ...Y-shaped: Used for rugs without holes.
 -
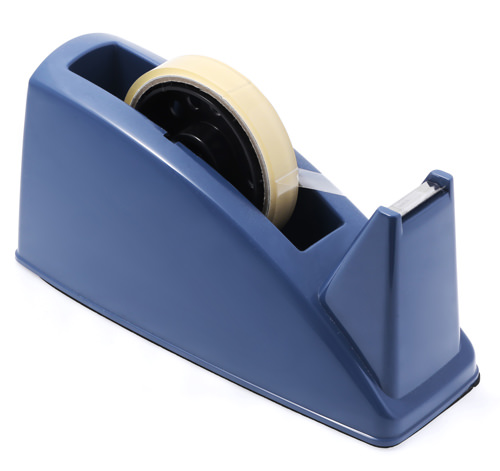
Scotch tape
Scotch tape, which can be found in almost every home, is essential for protecting your precious wristwatch.
-
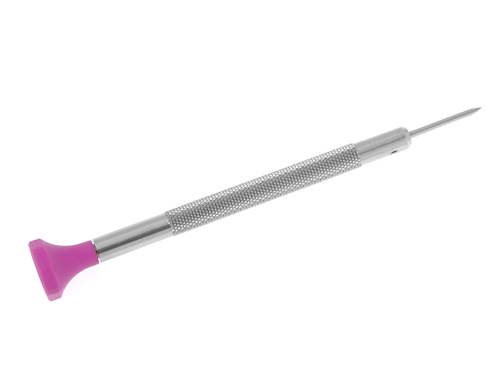
driver
For watches with a "side-screw" design where the spring bars on the lugs and the buckle are attached with screws, a screwdriver is used for removal. It is recommended to use a precision screwdriver that matches the size of the watch's screws. Note that the watch may become magnetized, so never use a screwdriver with a magnet.
How to replace the belt
Once you've purchased your favorite watch strap, try changing it yourself using the tools mentioned above! It's easy once you get the hang of it. However, remember that you're handling your precious, everyday watch, so be sure to take utmost care to avoid scratches and impacts.
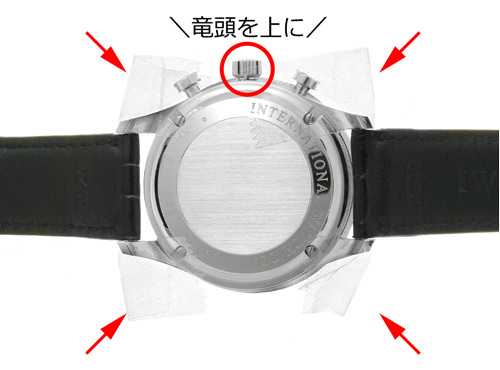
Before you begin changing the strap, make sure to check how you're positioning your watch! Place it so that the delicate crown and pushers are facing upwards. Also, it's crucial to protect your watch from scratches while handling tools. Apply cellophane tape to the case and lugs to ensure proper protection.
Rug with holes
How to remove
Tools used: Spring bar (pin type)
-
1 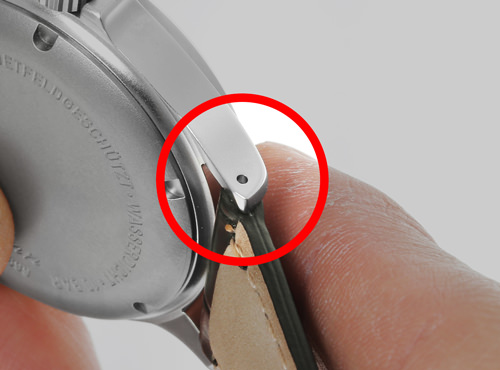
1. Check if there is a hole on the side of the rug.
-
2 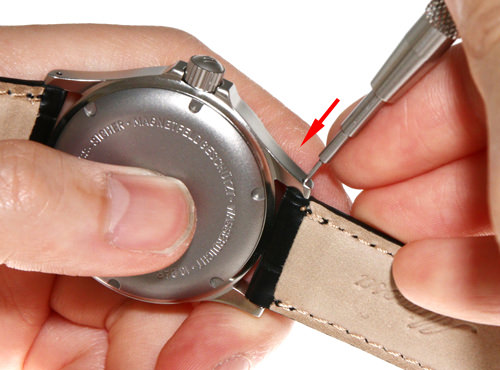
2. Use a spring bar removal tool to push the spring bar protrusion through the hole next to the lug.
-
3 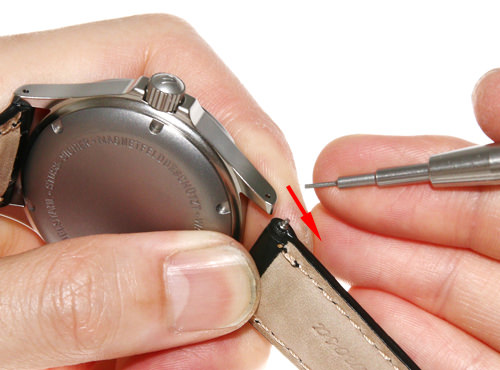
3. While keeping the spring bar pressed in, slowly slide the belt down.
-
4 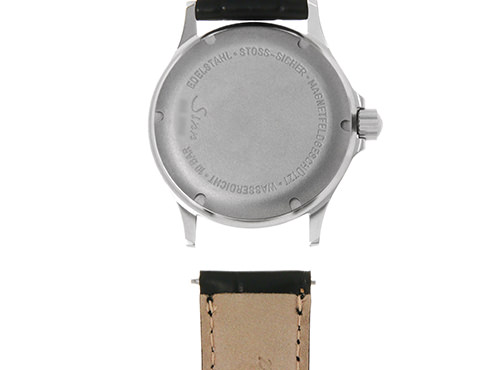
4. Remove the spring bar on the opposite side from the receiving hole, and you're done.
Installation method
Tools used: Spring bar (pin type)
-
1 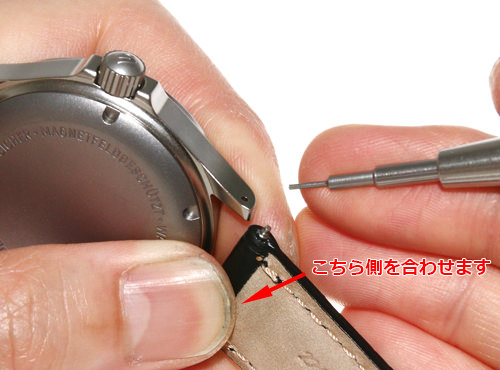
1. Align the spring bar on one side with the hole in the spring bar holder.
-
2 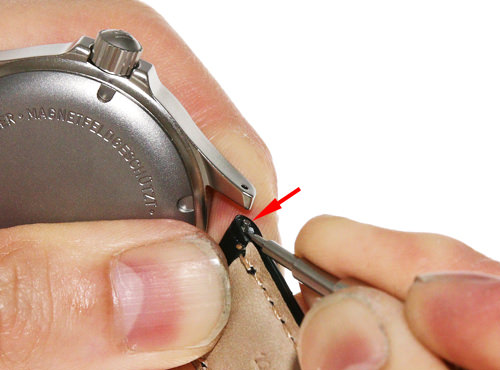
2. Push in the other spring bar using a spring bar tool.
-
3 
3. While keeping the spring bar pressed in, slowly slide the belt down.
-
4 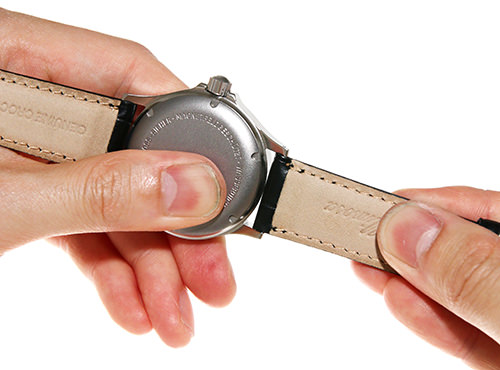
4. Once you hear a click and the spring bar clicks into place, check that the belt is securely in place and the installation is complete.
Rug without holes
How to remove
Tools used: Spring bar (Y-shaped)
-
1 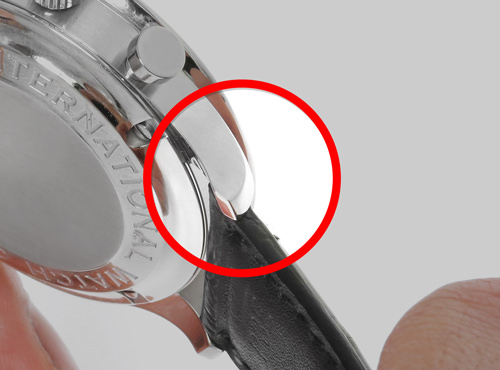
1. Check that there are no holes next to the lug.
-
2 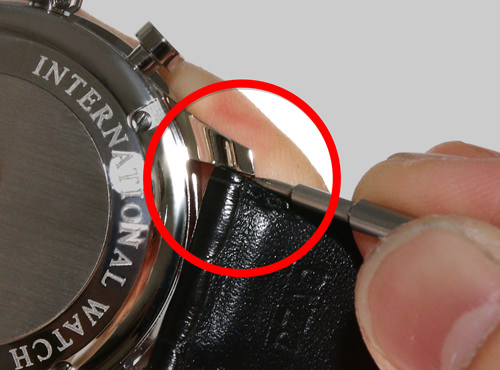
2. There is a gap on the side of the lug on the back of the belt where you can see the spring bar, so push in the spring bar removal tool.
-

3. Pull in the direction of the arrow.
-
3 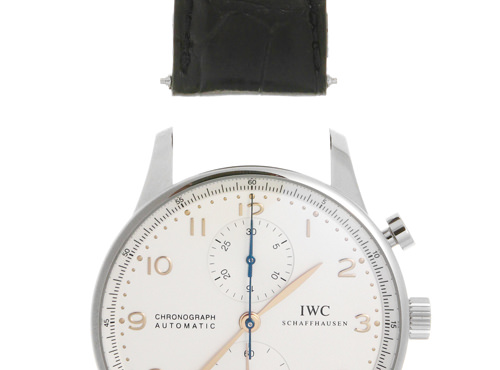
4. Remove the spring bar on the opposite side from the receiving hole, and you're done.
Installation method
Tools used: Spring bar (Y-shaped)
-
1 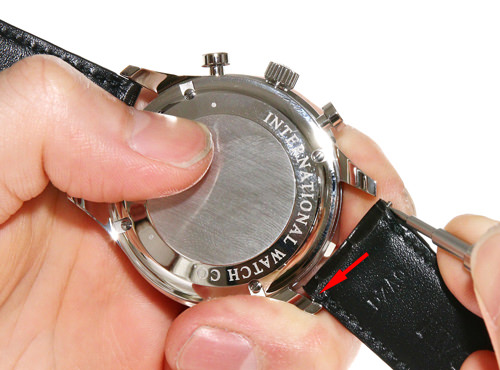
1. Align the spring bar on one side with the hole in the spring bar holder.
-
2 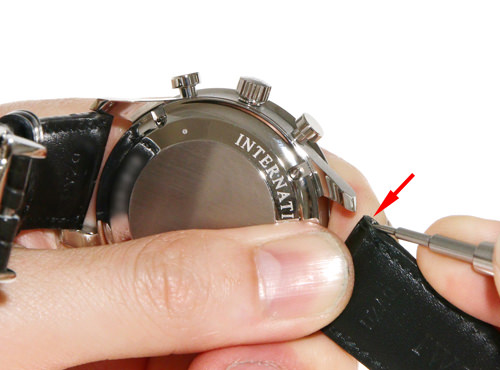
2. Push in the other spring bar using a spring bar tool.
-
3 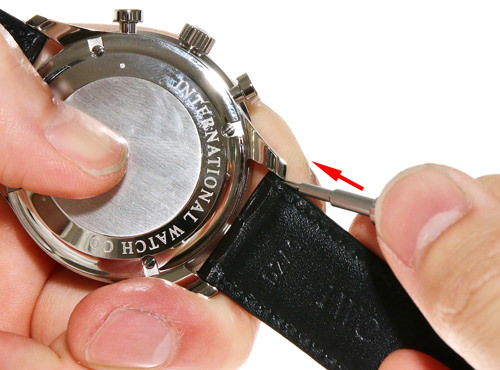
3 3. While keeping the spring bar pressed in, slowly slide the belt down.
-
4 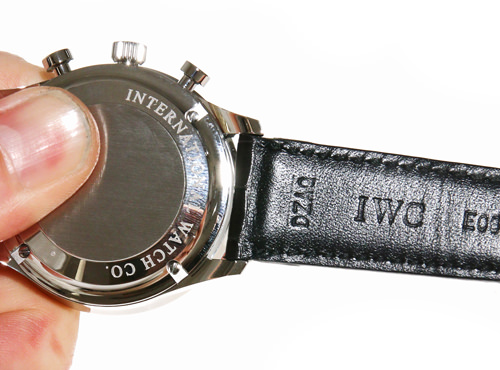
4. Once you hear a click and the spring bar clicks into place, check that the belt is securely in place and the installation is complete.
Clicker type
How to remove
-
1 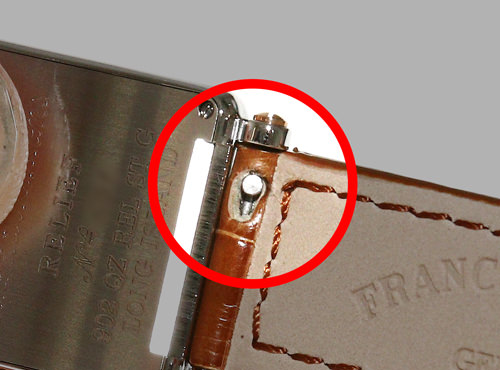
1. Check if there is a lever on the back of the belt as shown in the picture.
-
2 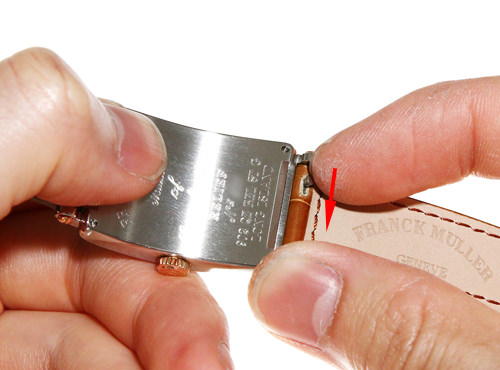
2. Sliding the lever with your finger will push the spring bar in.
-
3 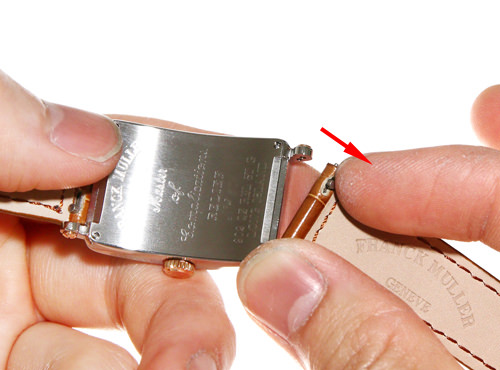
3. While keeping the spring bar pressed in, slowly slide the belt down.
-
4 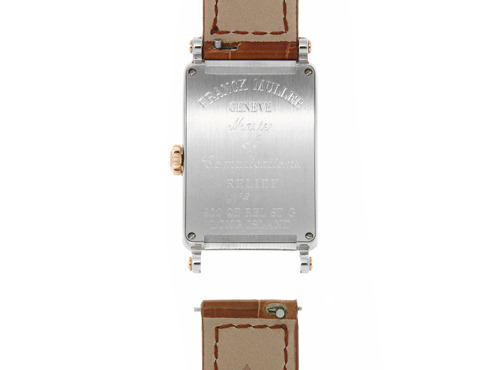
4. Remove the spring bar on the opposite side from the receiving hole, and you're done.
Installation method
-
1 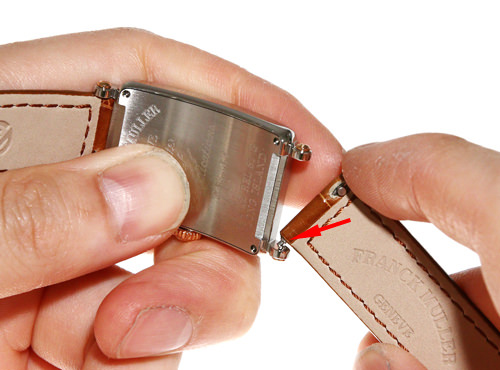
1. Align the spring bar on one side with the hole in the spring bar holder.
-
2 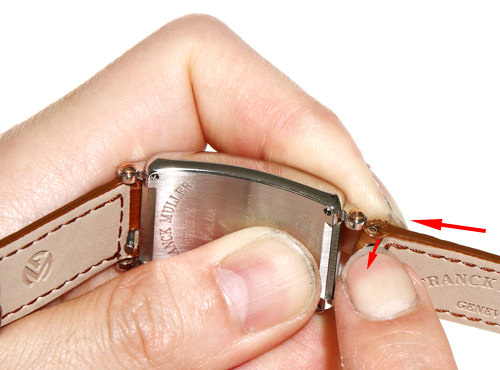
2. Slide the lever with your finger to push the spring bar in, then slowly slide the belt down.
-
3 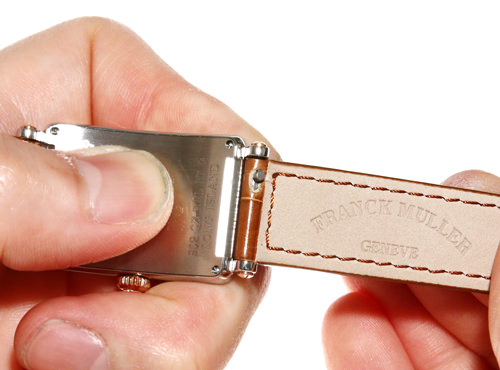
3. Once you hear a click and the spring bar clicks into place, check that the belt is securely in place and the installation is complete.
Side-screw type
How to remove
Tools used: screwdriver
-
1 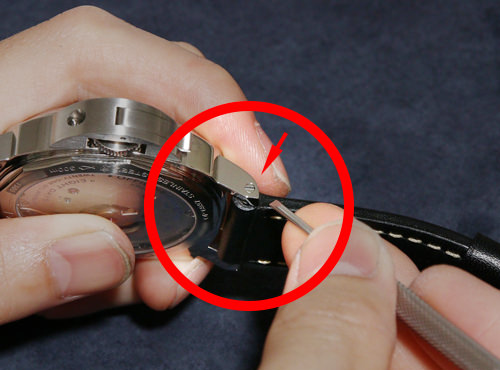
1. Confirm that there is a screw next to the lug.
-
2 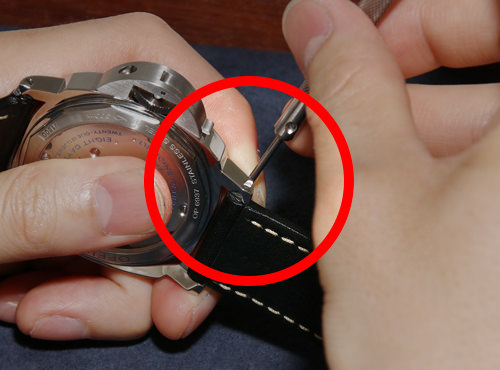
2. Slowly turn the screw using a screwdriver that fits the screw groove.
-
3 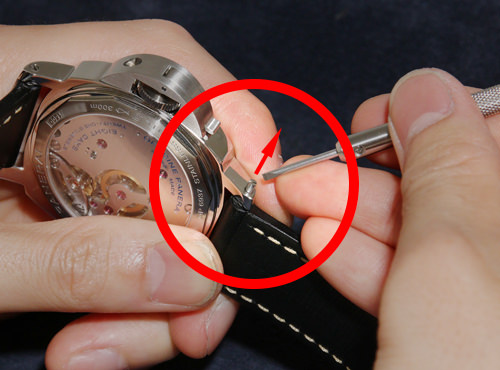
3. Turn it all the way until the screw-on pin pops out, then remove the pin.
-
4 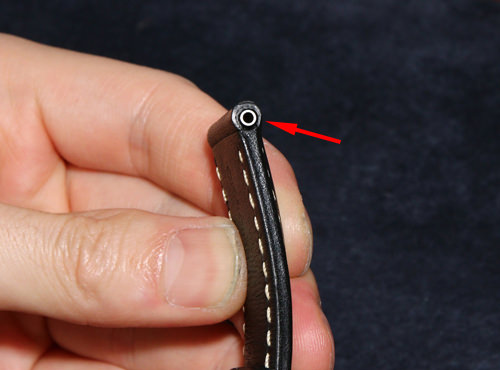
4. Remove the remaining pipe from the belt (some watches may not have a pipe, or may have screws on both sides).
-
5 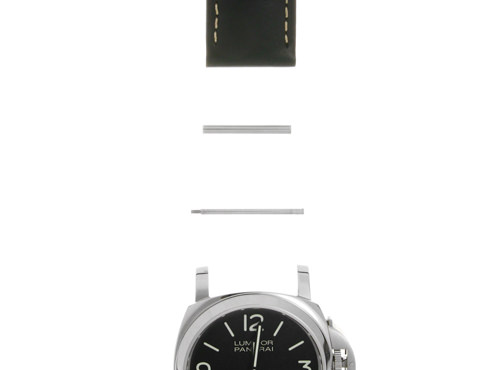
5. The removal is now complete.
Installation method
Tools used: screwdriver
-
1 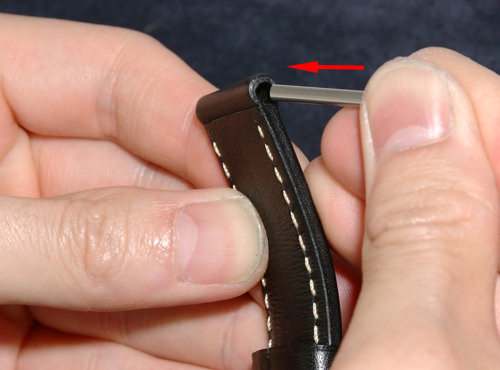
1. Attach the pipe to the belt.
-
2 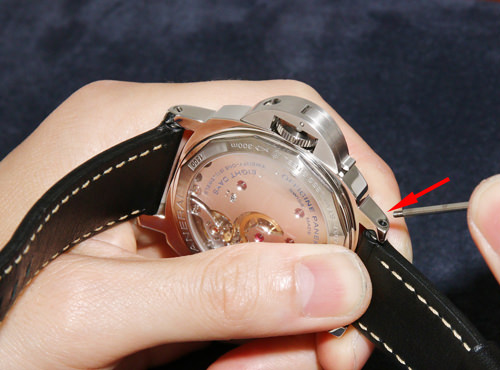
2. Align the watch and strap with the holes and insert the screw-type pin.
-
3 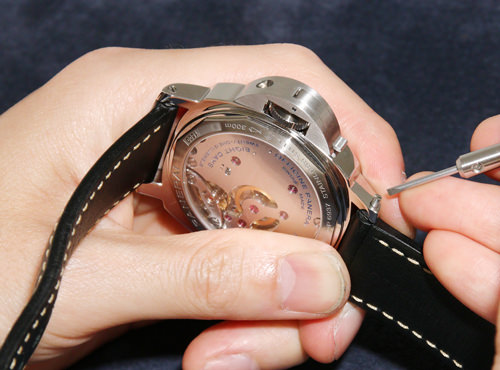
3. Slowly turn the screw using a screwdriver that fits the screw groove.
-
4 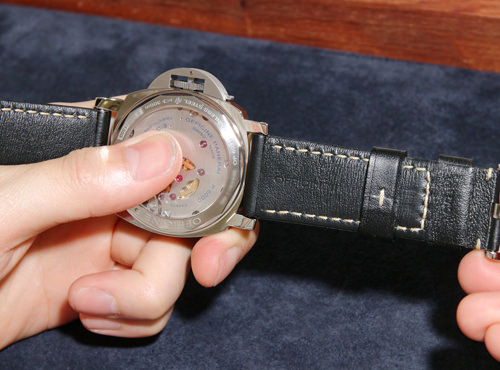
4. Once the screws are firmly in place and can no longer be turned, check that the belt is securely fastened and the installation is complete.
How to replace the buckle
Next, we will explain how to remove the buckle and replace it with a new strap.
Buckle type
How to remove
Tools used: Spring bar (Y-shaped)
-
1 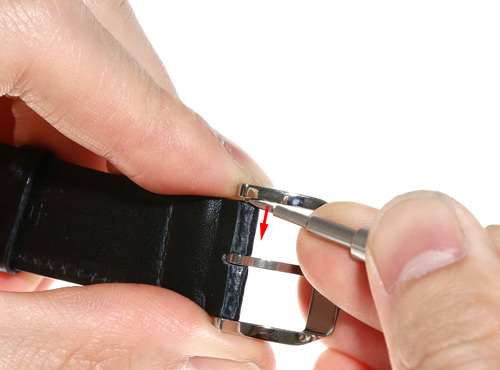
1. There is a gap at the side of the buckle where the spring bar is visible, so push the spring bar in.
-
2 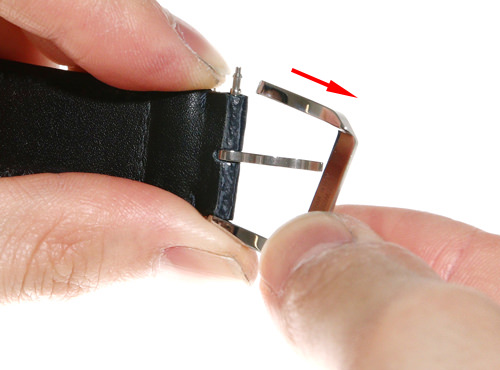
2. While keeping the spring bar pressed in, slowly slide the buckle.
-
3 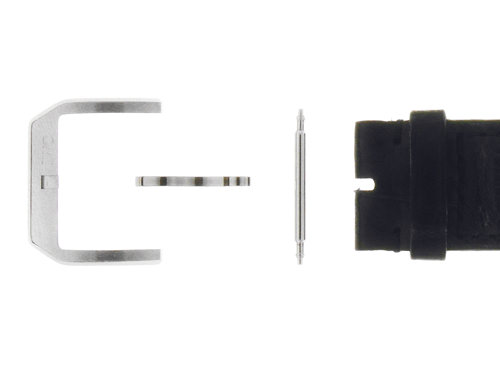
3. Once the buckle is removed, take the spring bar out of the strap, and remove the pin as well to finish.
Installation method
Tools used: Spring bar (Y-shaped)
-
1 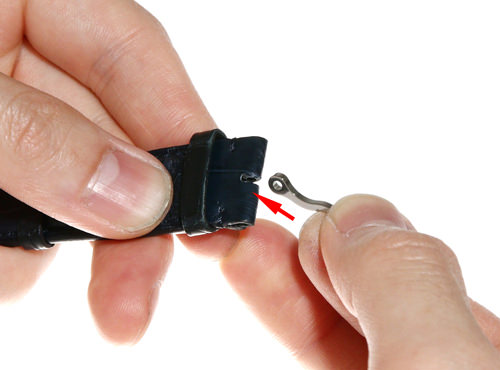
1. First, insert the tsuku stick into the belt.
-
2 
2. Insert the spring bar into the belt, hooking the bar onto it.
-
3 
3. Align the spring bar with the receiving hole on one side of the buckle.
-
4 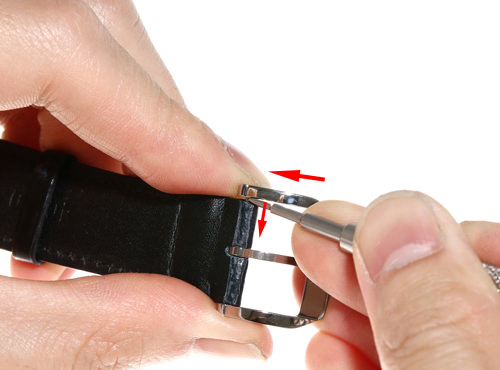
4. While pushing in the spring bar on the opposite side, fasten the buckle.
*Please be careful to ensure that the pin is positioned above the buckle at this time. -
5 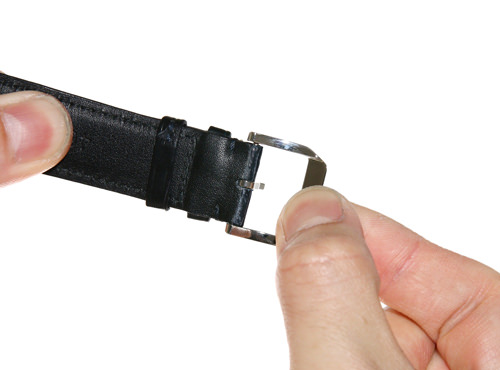
5. Once you hear a click and the spring bar clicks into place, check that the buckle is securely fastened and the installation is complete.
D-buckle type
How to remove
Tools used: Spring bar (Y-shaped)
-
1 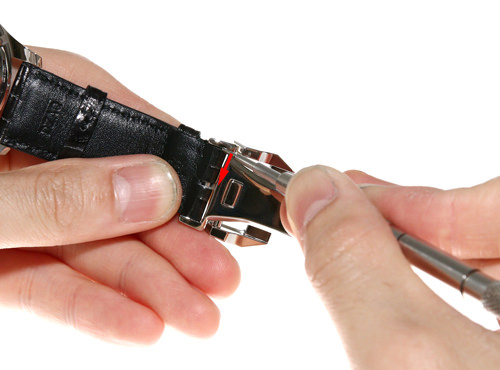
1. There is a gap at the side of the base of the D-buckle where you can see the spring bar, so push the spring bar in.
-
2 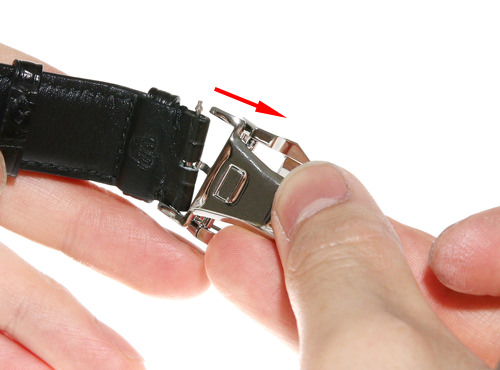
2. While keeping the spring bar pressed in, slowly slide the D-buckle.
-
3 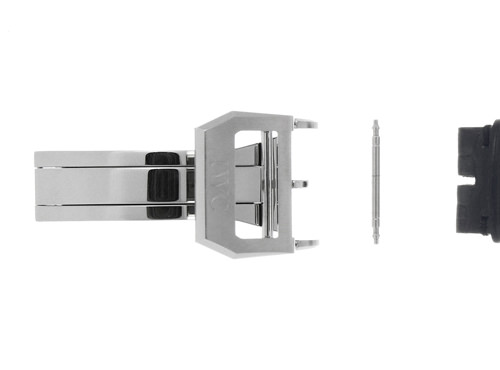
3. Once the D-buckle is detached, remove the spring bar from the strap, and you're done.
Installation method
Tools used: Spring bar (Y-shaped)
-
1 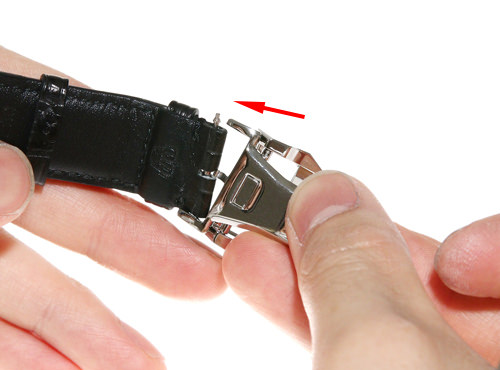
1. Insert the spring bar, aligning the center with the notch in the belt, and then align it with the receiving hole on one side.
-
2 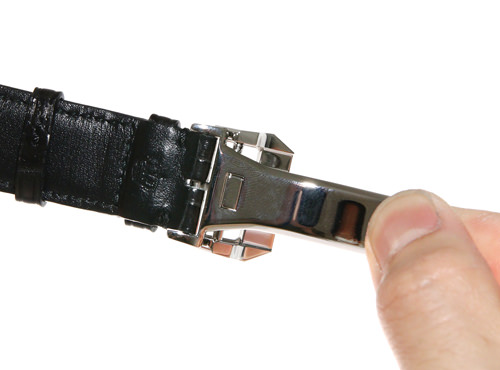
2. Push in the spring bar on the opposite side while attaching the D-buckle, and the installation is complete.
Type with screws on the side of the buckle
How to remove
Tools used: screwdriver
-
1 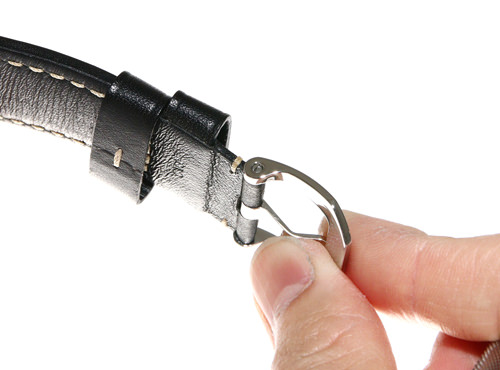
1. Check that there are screws on the side of the buckle.
-
2 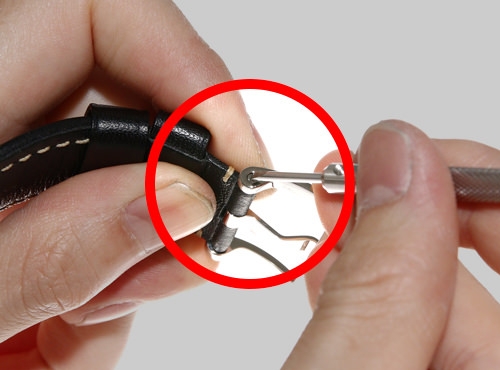
2. Slowly turn the screw using a screwdriver that fits the screw groove.
-
3 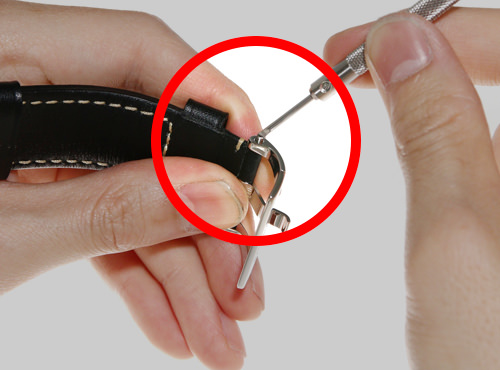
3. Turn it all the way until the screw-on pin pops out, then remove the pin and detach the buckle and pin.
-
4 
4. The removal is now complete.
Installation method
Tools used: screwdriver
-
1 
1. Check the front and back of the tsuku rod and align it with the notch in the center of the belt.
-
2 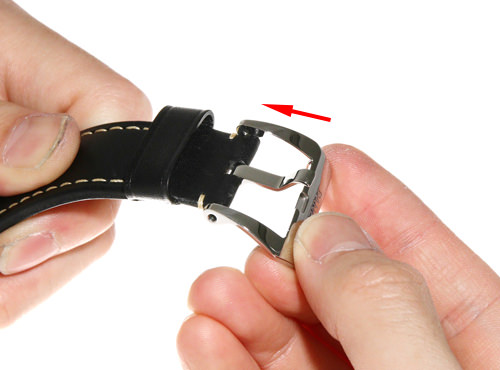
2. Next, check the front and back of the buckle and align it with both ends of the belt.
-
3 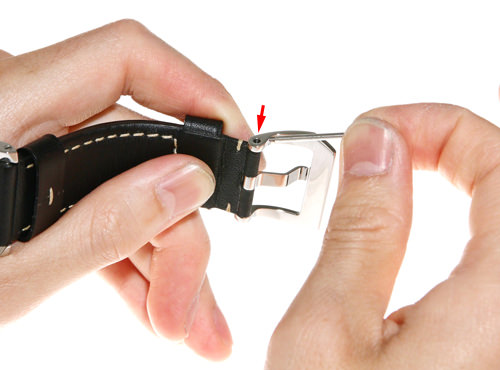
3. Insert the screw-on pin.
-
4 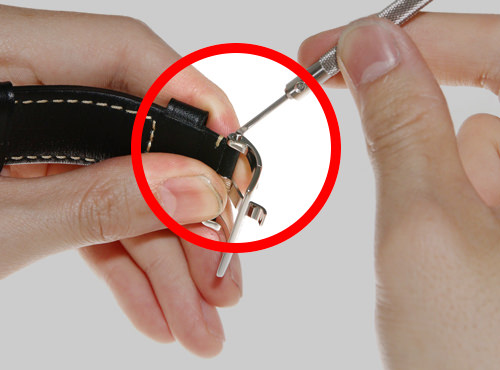
4. Slowly turn the screw using a screwdriver that fits the screw groove.
-
5 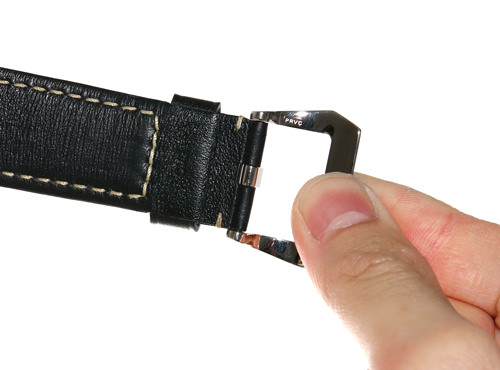
5. Once the pin is in place in the buckle, check that the buckle is secure and not coming undone, and you're done.
![]()